> ## Documentation Index
> Fetch the complete documentation index at: https://docs.mindgard.ai/llms.txt
> Use this file to discover all available pages before exploring further.
# Sharing projects
# Explanation
Project sharing within Mindgard lets you collaborate with teammates that test similar targets, review test results, and apply remediation advice to better defend your products. Sharing is configured using Mindgard's web user interface.
## Role Definitions
Project Owner: The user that created a given project. The owner may not be changed and cannot be removed from the project by a Project Admin.
Project Members: Users that can view results and execute new tests.
Project Admins: Admins can perform tests and view results as well as add, edit permissions, or remove users from the project. Note that an admin may not demote their role or delete their own user from the project.
# How to manage project sharing
Navigate to the project you wish to manage by clicking *Projects* in the left navigation pane and then clicking anywhere in the row of the project to bring up its dedicated page.
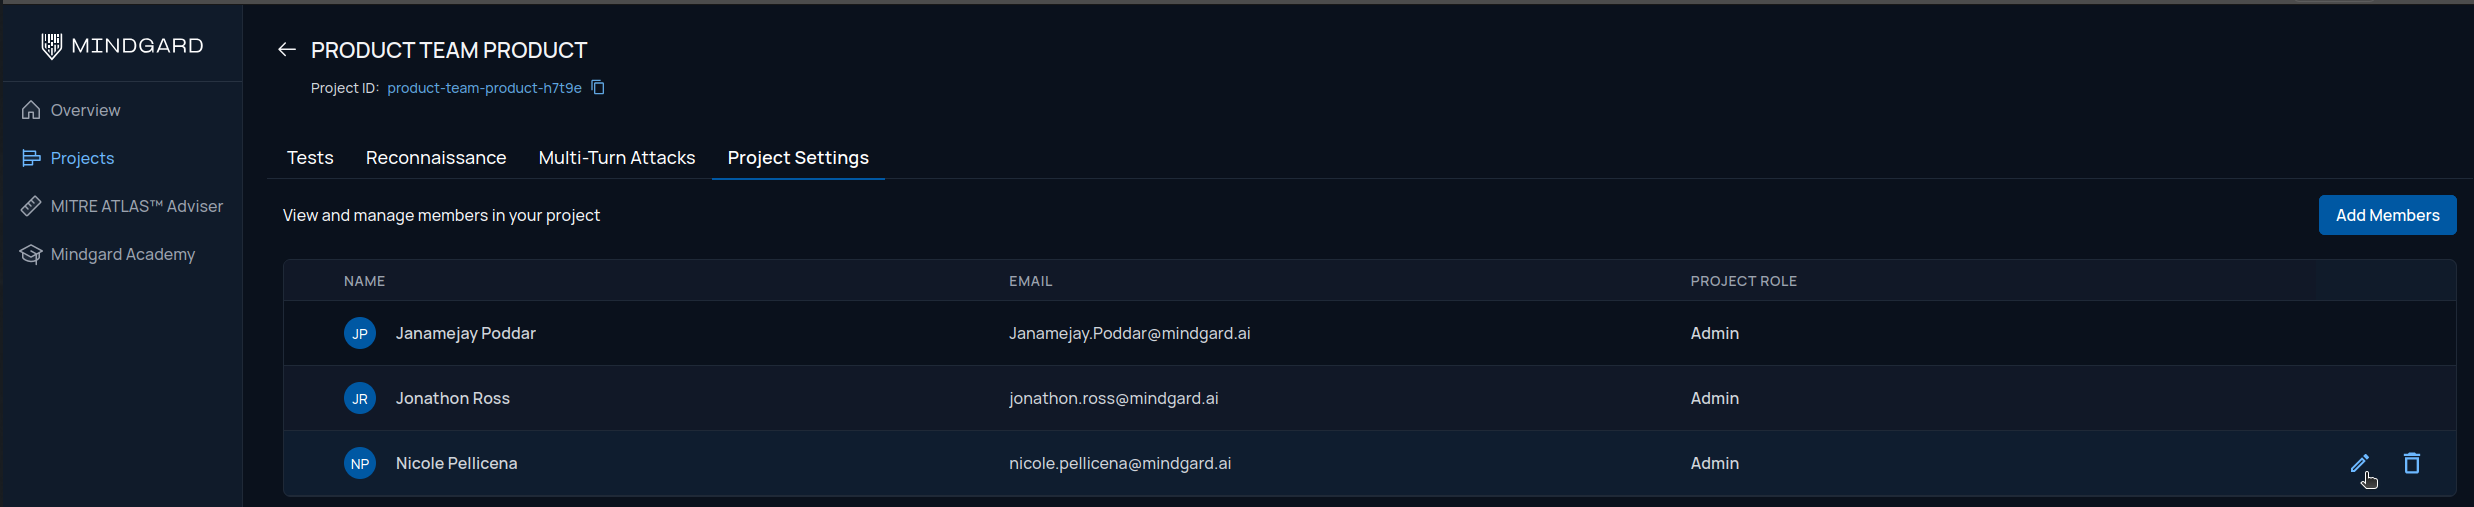
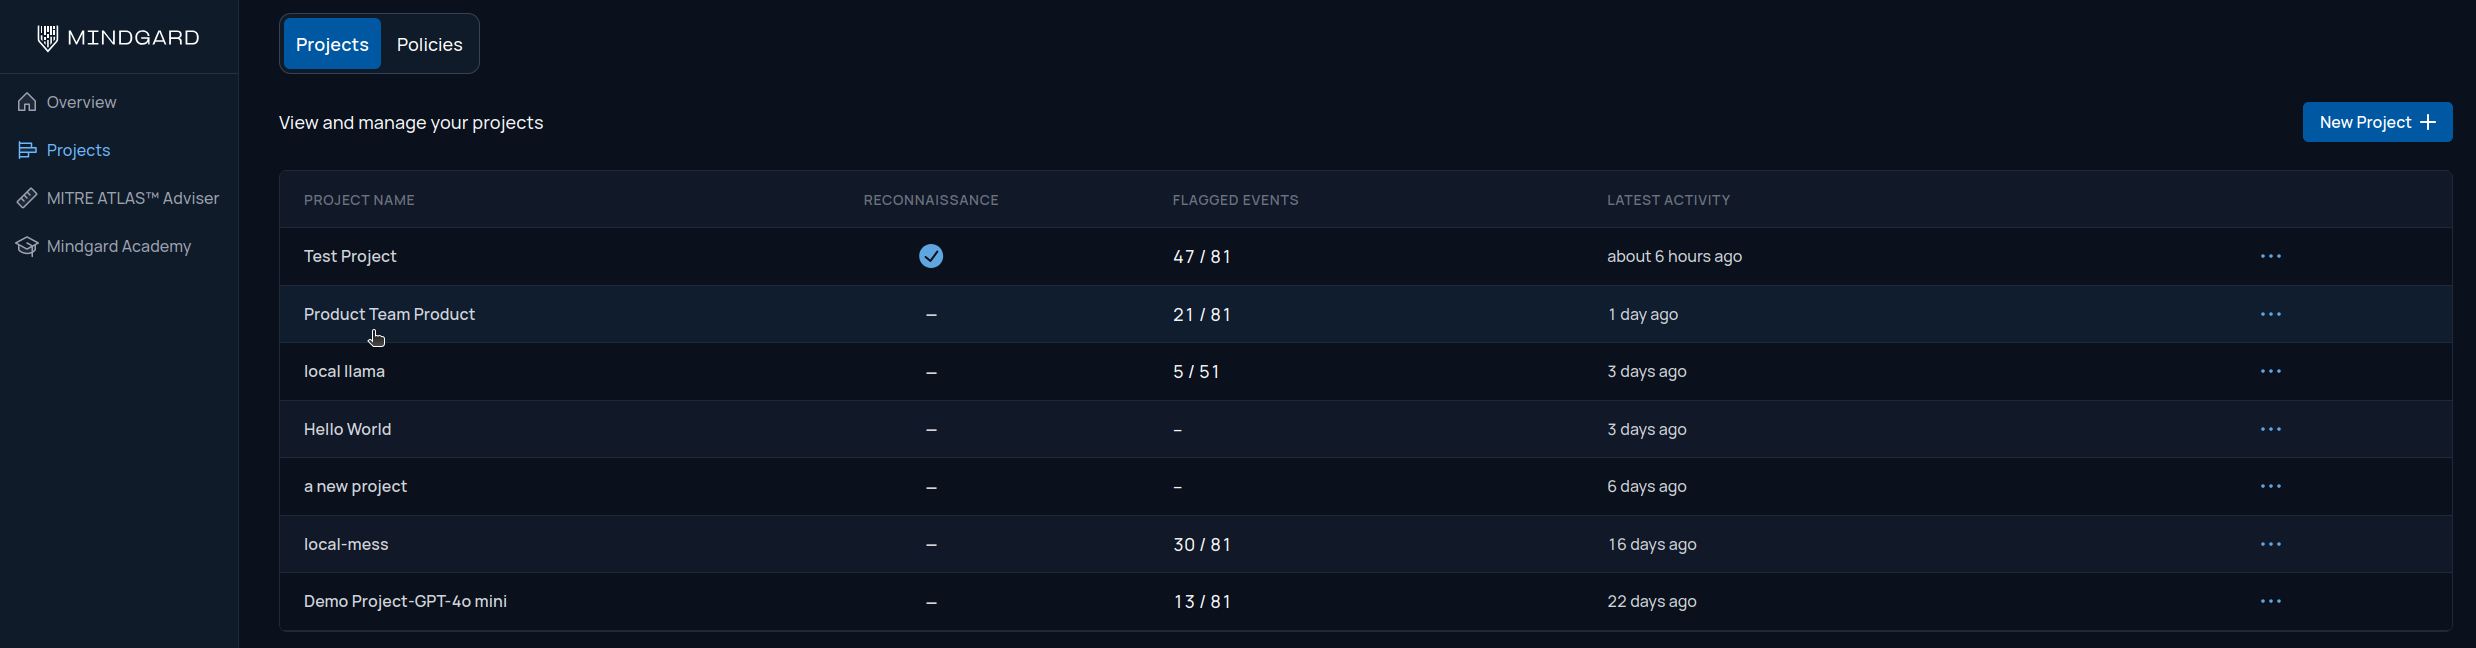 On the project over the test results are a row of options. Click on Project Settings to view the project's assigned users.
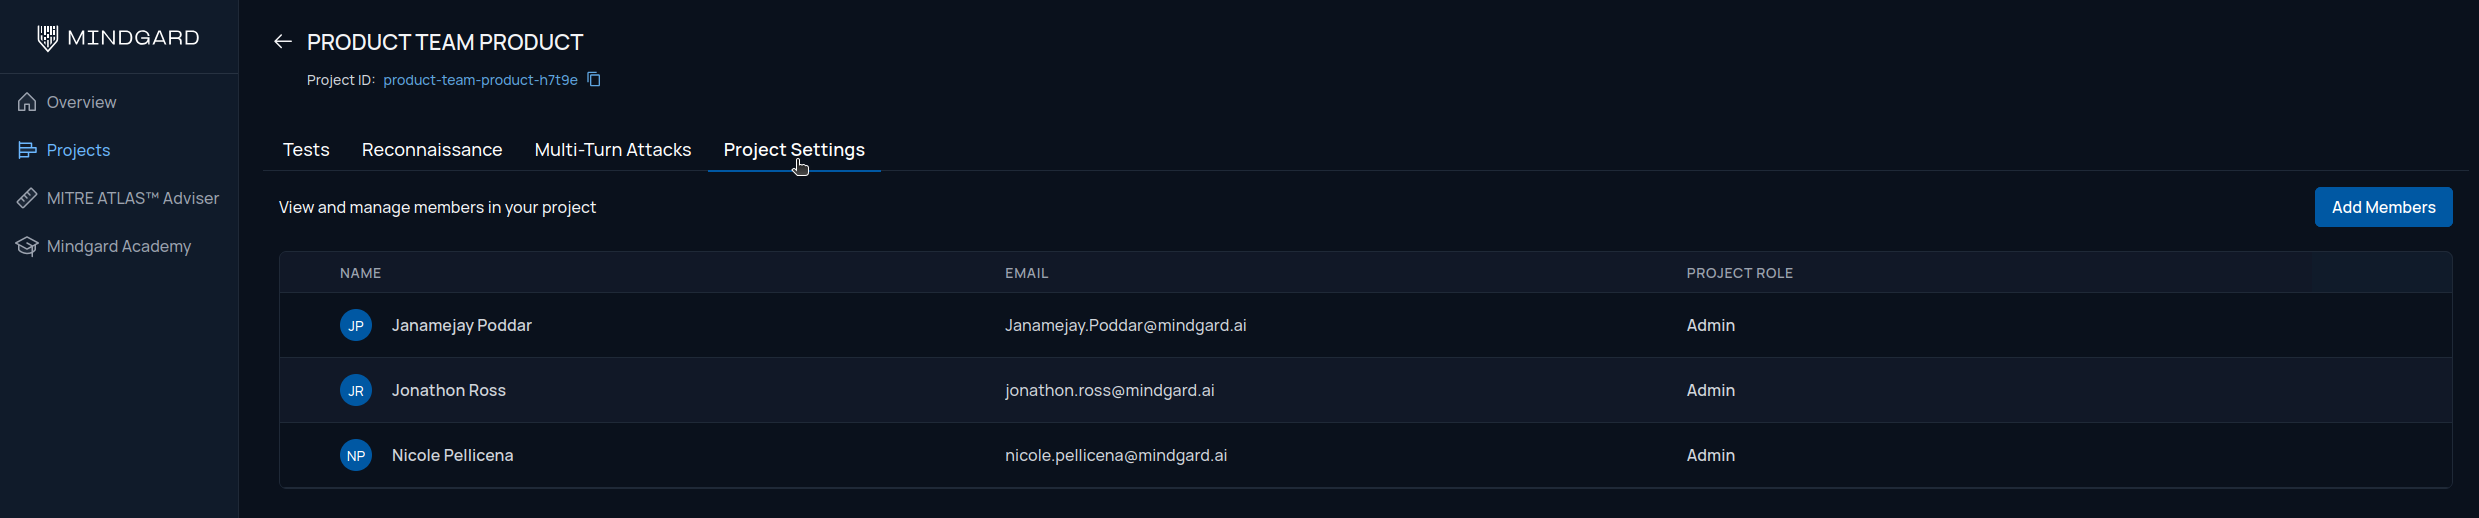 All management actions are performed on this page.
# Management Actions
## Adding members
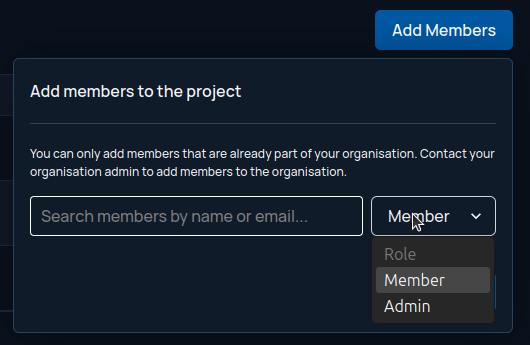
To add users to your project click the Add Members button above the member list on the right side of the page.
All management actions are performed on this page.
# Management Actions
## Adding members
To add users to your project click the Add Members button above the member list on the right side of the page.
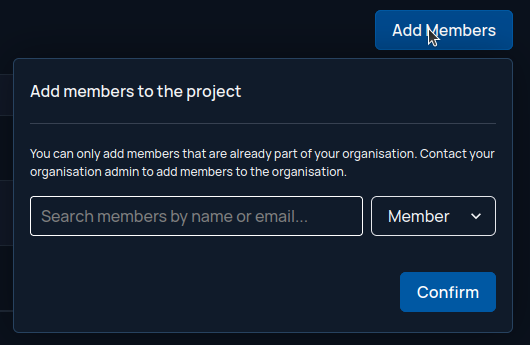 A pop up will appear offering you the ability to search for users and assign their role. As a best practice first select the role, either Admin or Member from the drop down on the right.
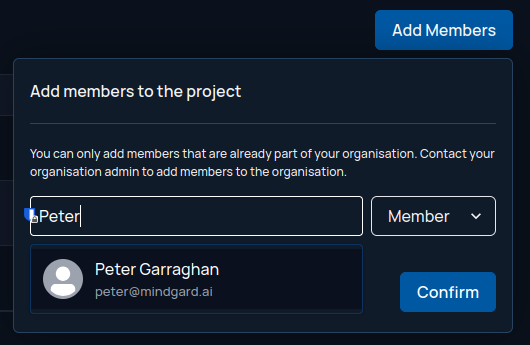
 Add the member by typing part of their name or email in the pop-up's text box. A drop down of search results should appear as you type. To speed up the process and avoid typographic errors click on the user once they appear in the search results.
 ## Editing permissions
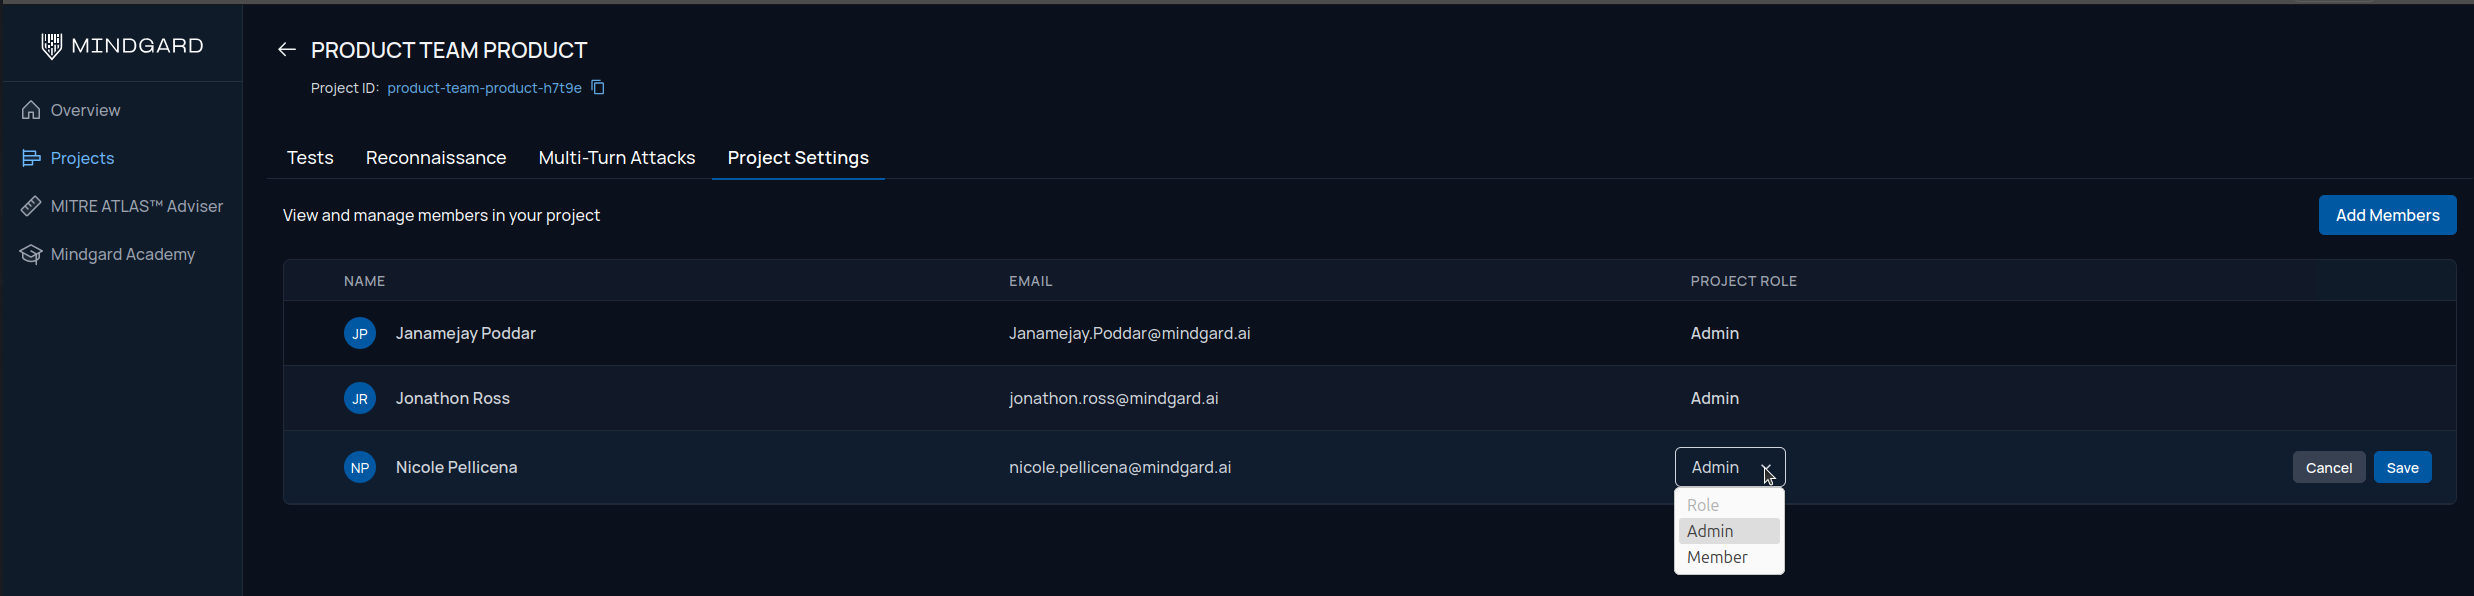
From the Project Settings page hove your mouse anywhere in the row of the user you wish to edit. A pencil and trash can icon will appear on the right of this row.
## Editing permissions
From the Project Settings page hove your mouse anywhere in the row of the user you wish to edit. A pencil and trash can icon will appear on the right of this row.
 Click the pencil to edit. The user's role within the row will now appear as a pull down allowing you to change the setting.
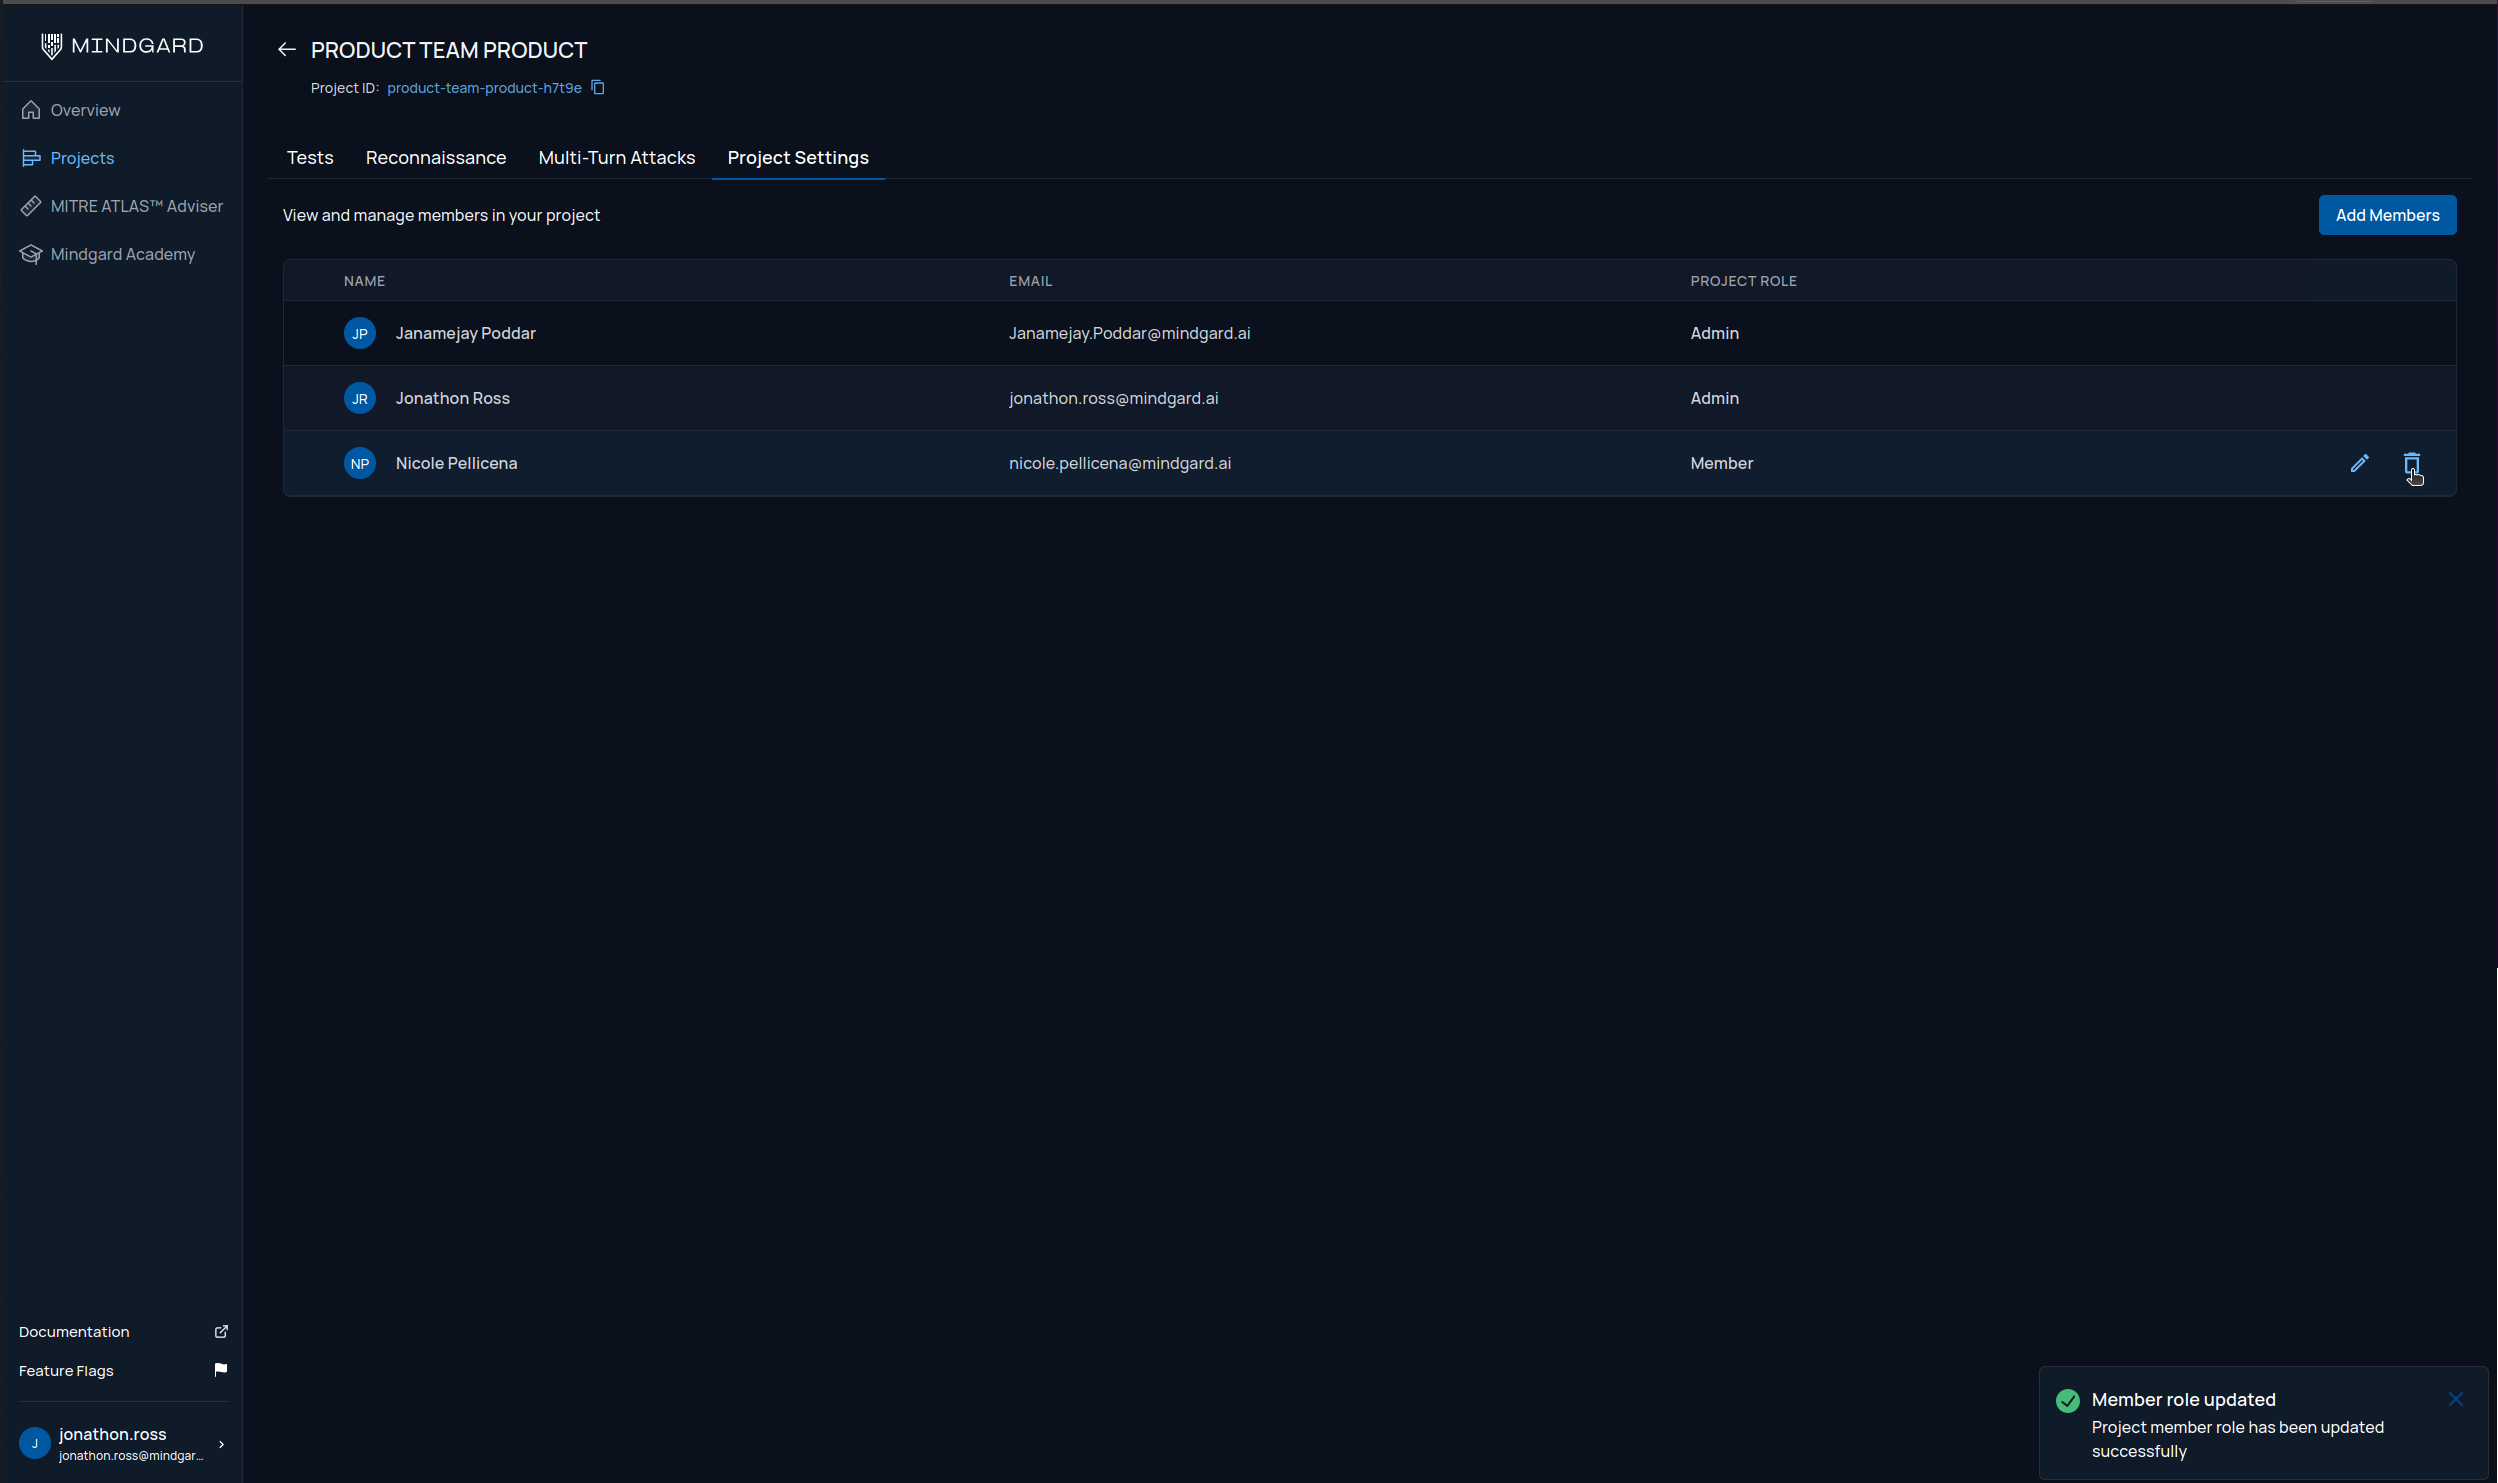
 Click the Save button to the right to commit your change, or use the Cancel button to exit the editing mode without making a change. If you choose to make a change a dialogue confirming the save operation will appear in the bottom right of the screen.
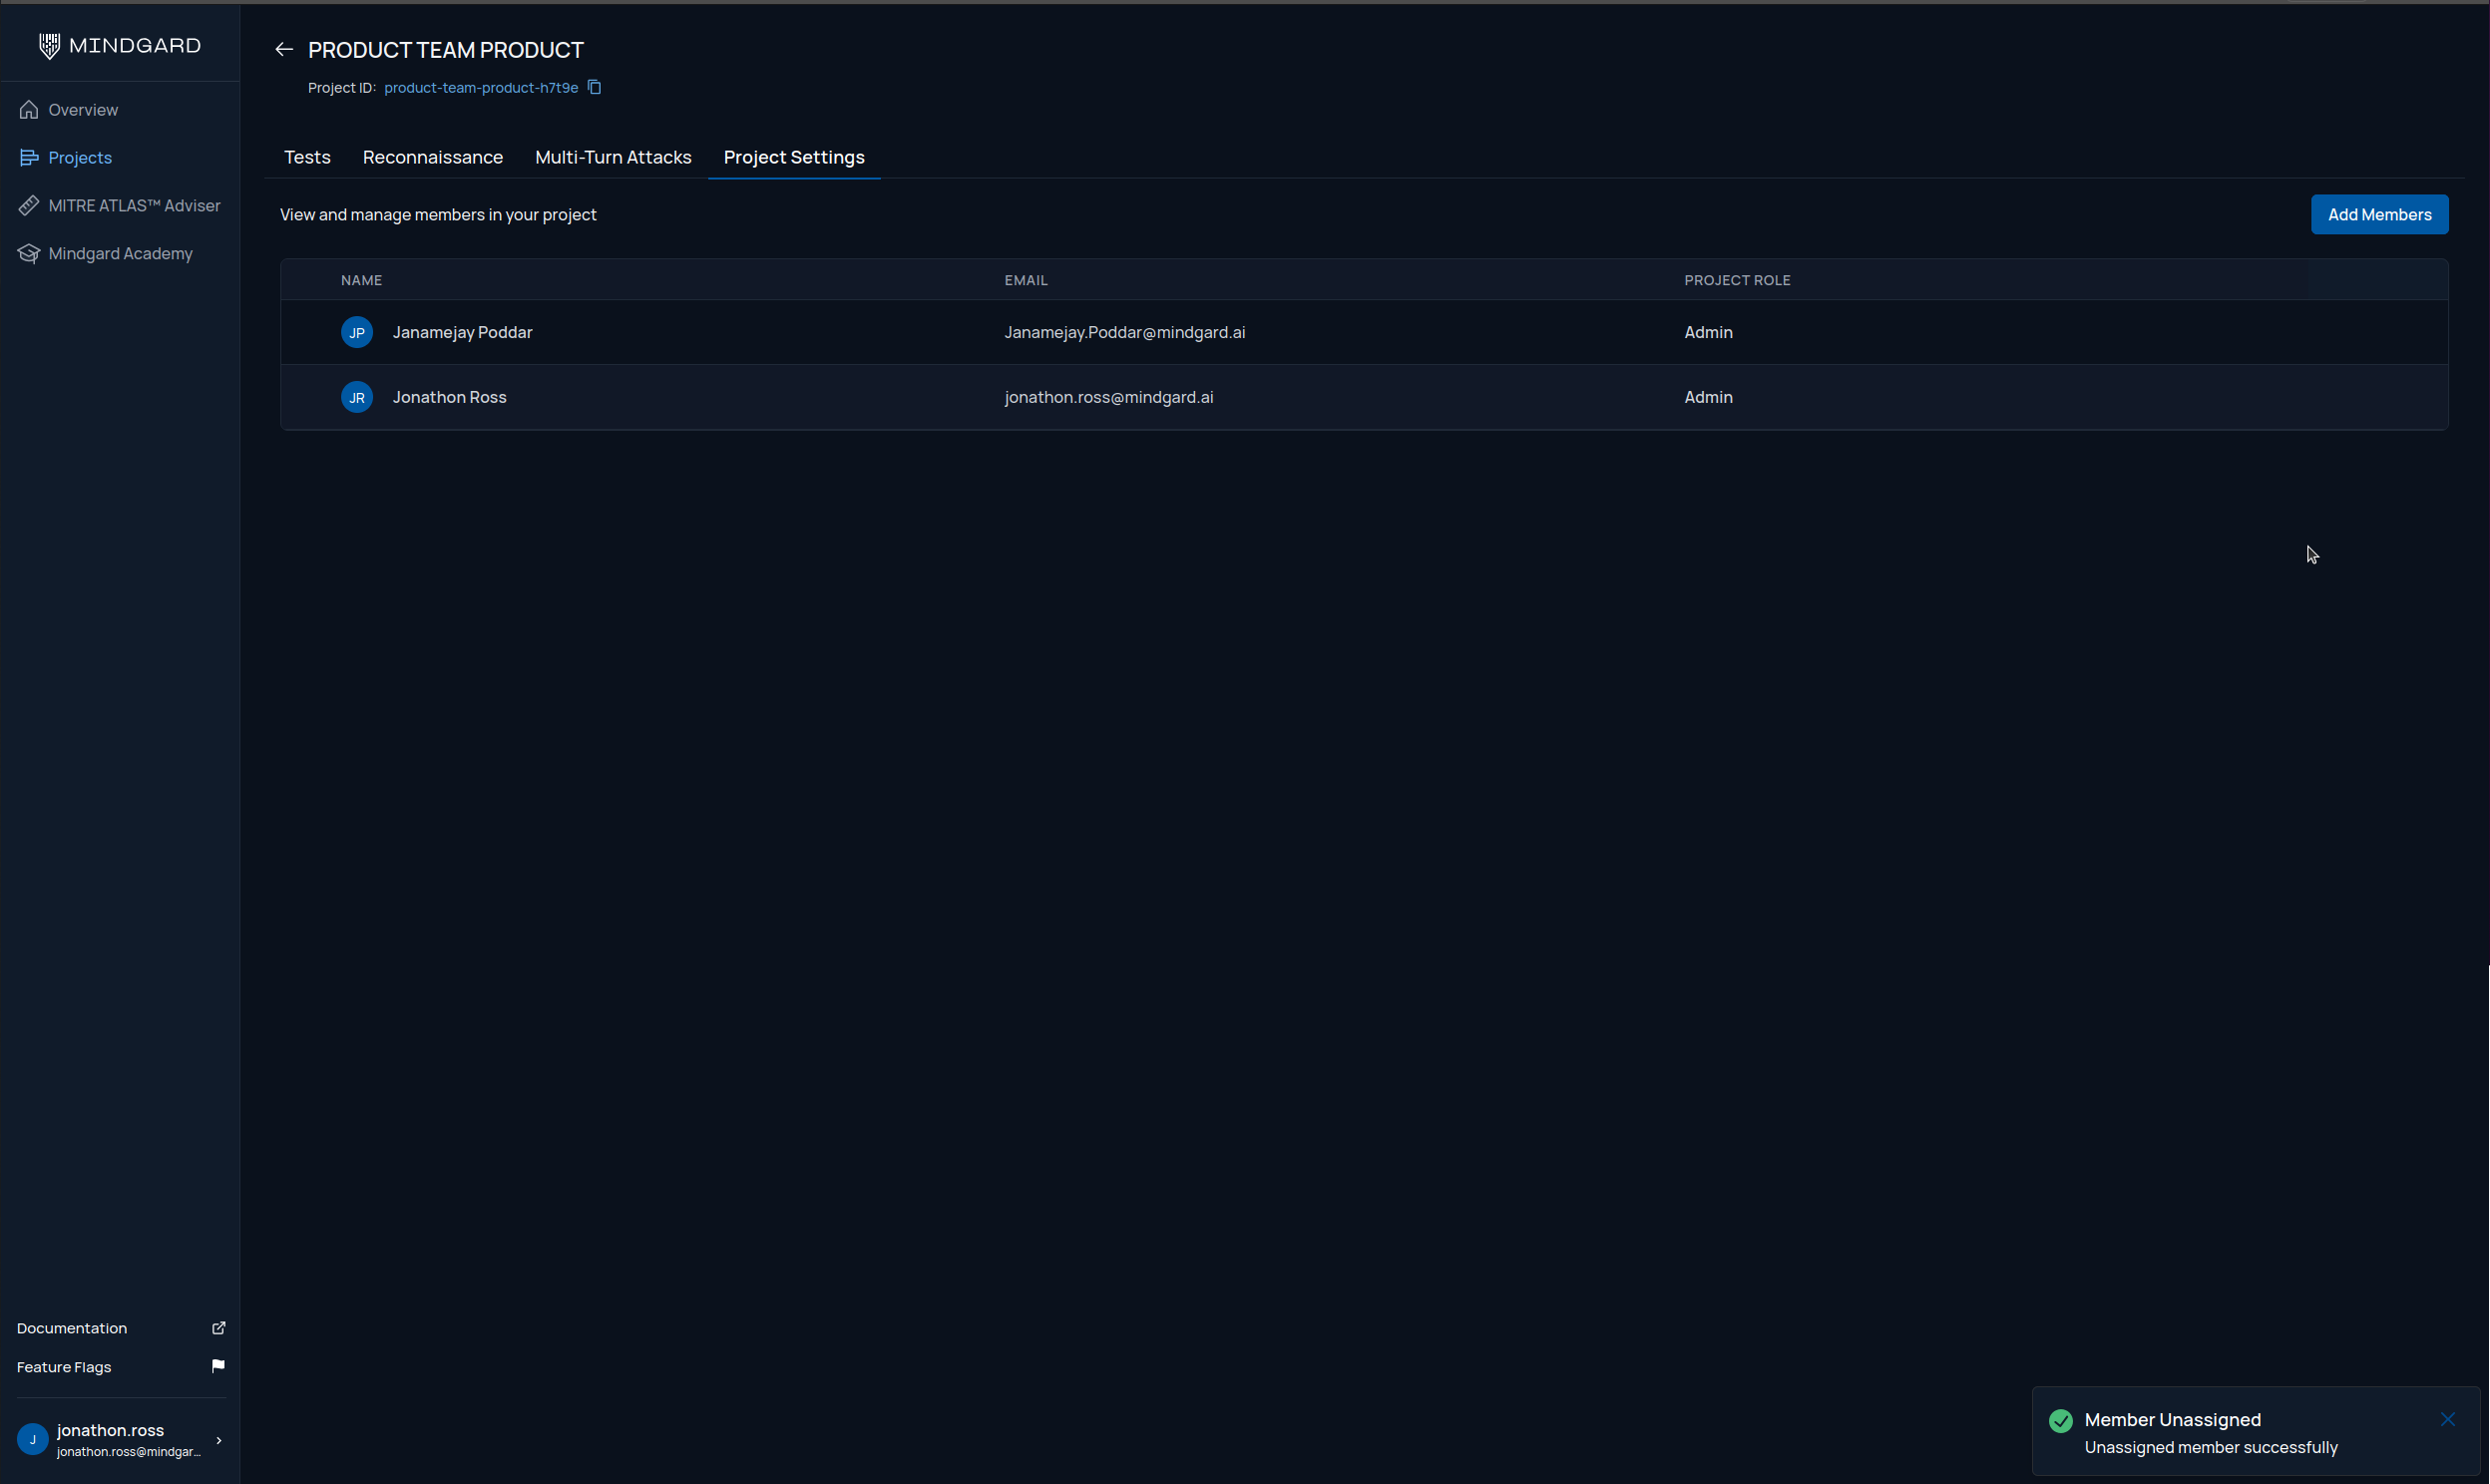
 ## Removing a member
From the Project Settings page hove your mouse anywhere in the row of the user you wish to delete. A pencil and trash can icon will appear on the right of this row. Click the trash can icon to bring up a confirmation dialog.
## Removing a member
From the Project Settings page hove your mouse anywhere in the row of the user you wish to delete. A pencil and trash can icon will appear on the right of this row. Click the trash can icon to bring up a confirmation dialog.
 Click Remove User in the confirmation pop up to complete the operation. A message confirming the member was removed will appear in the bottom right of the screen and the user list should update quickly after to reflect the change.